I used Borg parts to attach it to a EOS body mount (more on this in another post) and an OM->EOS adapter to mount it on the back of my OM 350/2.8. The Borg parts allow mounting filters inside. I stacked a Kenko R64 and Baader Fringe Killer to make a fairly wide-band H-α filter.
The results were not good to say the least.
 |
| 100% crop from top left |
 |
| 100% crop from top right |
 |
| Full frame |
The OM 350/2.8 hadn't shown any problems in daytime and night-time scene test shots, nor in fixed-tripod shots of star fields. This looked like the CCD was very badly misaligned with respect to the image plane.
Without any measurements, it was clear enough that the CCD was not square with the front plate.
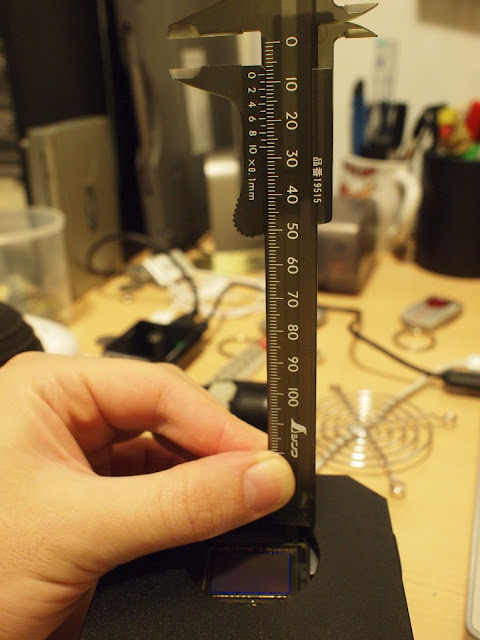
Measuring confirmed this:
 |
| 11mm on the top left |
 |
| 8mm on the top right! |
A 3mm difference from edge to edge is pretty huge.
So, I set about taking the QHY8 apart.
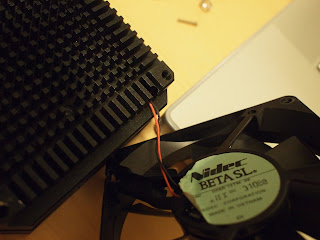
The QHY8 is quite simple and easy to take apart. Remove the four screws holding on the fan. In the resulting holes there are a further four small hex screws. Remove these and you can open the case.
Note that opening the case will break the silicone sealing around the USB and power ports. This is no real problem as these can be re-sealed. The QHY8 doesn't appear to be fully air-tight anyway.
Besides, before attaching the Borg parts, I had already taken off the original T-ring threaded attachment with AR glass, that protects the CCD, exposing the innards to the air. On the first run, it fogged up quickly, taking over 40 minutes to clear. Leaving it in my dry cabinet over a couple of days solved this minor problem. It now clears after a couple of minutes. Presumably the foam had been saturated when in storage/transport.
In the above photo, you can see the "cold finger" that the CCD is attached to. I didn't pry this up, but presumably it is attached to the Peltier coolers and it seems to be insulated from the main board. On the metal plate, there are three holes, but only two plastic spring-loaded bolts/spacers, which are not threaded, on the right hand side. The top of the bolts merely rest against some foam on the inside of the front plate.
This hardly seems like a mechanism designed to obtain and keep accurate alignment of the CCD. Photos of other QHY8 units on the web show a quite different board with three metal screws providing a reasonable-looking mechanism to adjust the CCD alignment.
Furthermore, these plastic spacers/bolts actually rest on top of components on the board.
 |
| Plastic bolt sitting on top of components |
It's difficult to see from this photo, but the front bolt has been bent and has left some marks on the chip it rests on top of. Not great.
 |
| Fraying of fan power cables |
As well as some questionable design, the assembly isn't great either. The power cables for the fan were not correctly placed in their channel, which has led to some fraying.
Anyway, I had a look through my little collection of bolts and bits and pieces and found a replacement plastic screw for a Borg helical focusser that fit the hole. This presses up against the foam on the underside of the front case, but didn't help with alignment until I added shims made from some spongy double-sided tape. I simply kept adding shims and measuring the depth of the CCD at its corners until it was fairly level and did some fine-tuning using the torque on the hex bolts holding the front and rear casings together.
I got the CCD as square to the front surface as my super accurate cheapo plastic vernier gauge could measure - which should be around 0.05mm.
At first I was pretty angry with the poor design and construction. This is a relatively inexpensive CCD, but still, the design, construction and QC is clearly very poor.
But at least it was easy to fix. The fix is temporary, and I intend to get a suitable plastic spacer and spring for a more permanent fix. But if this kludgy fix holds for long enough, I expect it will remain until the CCD gets out of alignment enough to annoy me.
One good thing about the QHY8 is the rubber seal between the front and rear casings. This seems to do a good job of damping the vibrations from the fan.
For not much more cash than a modified DSLR, you get a compact, lightweight, cooled OSC camera with 16-bit output and a decent-sized CCD. Issues with the drivers seem to have been worked out, and I had no problems using the QHY8 with Nebulosity on my Mac. A new DSLR would have higher resolution, but that's not much of a benefit for astro imaging.
However, with the QHY8, at least the one I got, you do have to put up with dodgy design, cheap construction and poor quality control. If you don't like pulling things apart to fix them and don't have a local dealer to sort stuff out for you, I wouldn't recommend the QHY8. The Orion Starshoot Pro, settling for a smaller CCD, saving and holding out for a good deal on a used SBIG camera might be better options.
Now, I just need some clear skies to test the kludgy fix.


[...] a previous post, I wrote about the trouble I had with my [...]
ReplyDelete